Image transformation
Translation
Translating an image is shifting it along the x and y axes.
A affine transformation can be obtained by using a transformation matrix M.
It is a translation matrix which shifts the image by the vector (x, y).
The first row of the matrix is [1, 0, x], the second is [0, 1, y]
M = np.float32([[1, 0, x], [0, 1, y]])
shifted = cv.warpAffine(img, M, size)
transform1.py
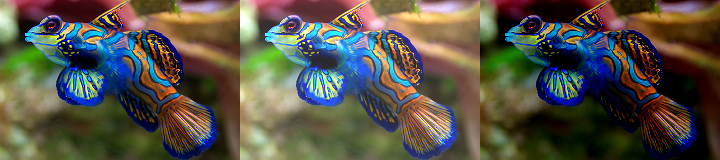
Rotation
When we rotate an image we need to specify the center of rotation. Here we take the center of the image:
h, w = img.shape[:2]
center = w//2, h//2
To obtain the rotation matrix we use the function cv.getRotationMatrix2D.
It takes three arguments:
- the rotation center,
- the roation angle and
- the scale factor
"""rotation an image using the trackbar."""
import cv2 as cv
def trackbar(angle):
M = cv.getRotationMatrix2D(center, angle, 1.0)
rotated = cv.warpAffine(img, M, (w, h))
cv.imshow('window', rotated)
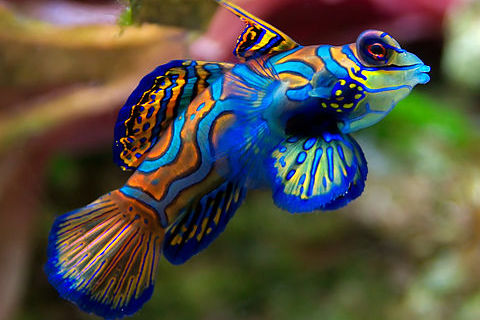
img = cv.imread('fish.jpg')
h, w = img.shape[:2]
center = w//2, h//2
cv.imshow('window', img)
cv.createTrackbar('angle', 'window', 0, 180, trackbar)
cv.waitKey(0)
cv.destroyAllWindows()
Scale
Scaling an image is to change its dimension.
"""scale an image using the trackbar."""
import cv2 as cv

def trackbar(scale):
    M = cv.getRotationMatrix2D(center, 0, scale/10)
    rotated = cv.warpAffine(img, M, (w, h))
    cv.imshow('window', rotated)

img = cv.imread('fish.jpg')
h, w = img.shape[:2]
center = w//2, h//2

cv.imshow('window', img)
cv.createTrackbar('scale', 'window', 10, 30, trackbar)

cv.waitKey(0)
cv.destroyAllWindows()
Flipping
Horizontally or vertically using a key.
"""Flip an image horizontally and vertically using keys."""
import cv2 as cv

img = cv.imread('fish.jpg')
cv.imshow('window', img)

while True:
    k = cv.waitKey(0)
    if k == ord('q'):
        break

    elif k == ord('v'):
        img = cv.flip(img, 0)

    elif k == ord('h'):
        img = cv.flip(img, 1)

    cv.imshow('window', img)

cv.destroyAllWindows()
Image artithmetic
The operation add and subtract allow to add two images.
The add function is limited to 255.
The subtract function is limit to 0.
In the example below we add or subtract the value (40, 40, 40) to each pixel.
As a result, the image becomes brighter or darker.
"""Add and subtract"""
import cv2 as cv
import numpy as np

img = cv.imread('fish.jpg')
img = cv.resize(img, None, fx=0.5, fy=0.5, interpolation=cv.INTER_CUBIC)
M = np.ones(img.shape, dtype='uint8') * 40

brighter = cv.add(img, M)
darker = cv.subtract(img, M)

img2 = np.hstack([img, brighter, darker])

cv.imshow('window', img2)
cv.waitKey(0)
cv.destroyAllWindows()
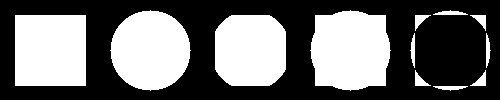
Bitwise operations
Bitwise operations act on grayscale images. Most often it is used on black and white images. We start wtih a circle and a square shape and calculate this three bitwise operations:
- and
- or
- xor (exclusive or)
"""Bitwise and, or and xor operation"""
import cv2 as cv
import numpy as np

d = 15
rect = np.zeros((100, 100), np.uint8)
cv.rectangle(rect, (d, d), (100-d, 100-d), 255, -1)

circle = np.zeros((100, 100), np.uint8)
cv.circle(circle, (50, 50), 40, 255, -1)

bit_and = cv.bitwise_and(rect, circle)
bit_or = cv.bitwise_or(rect, circle)
bit_xor = cv.bitwise_xor(rect, circle)

img = np.hstack([rect, circle, bit_and, bit_or, bit_xor])

cv.imshow('window', img)
cv.waitKey(0)
cv.destroyAllWindows()
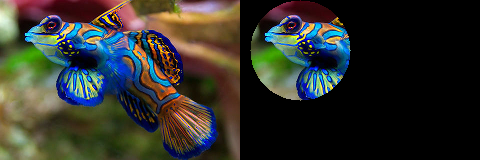
Masking
We can use a mask to extract only a certain part of an image.
"""Masking."""
import cv2 as cv
import numpy as np

img = cv.imread('fish.jpg')
img = cv.resize(img, None, fx=0.5, fy=0.5, interpolation=cv.INTER_CUBIC)
mask = np.zeros(img.shape[:2], dtype='uint8')
cv.circle(mask, (60, 50), 50, 255, -1)

masked = cv.bitwise_and(img, img, mask=mask)
img2 = np.hstack([img, masked])

cv.imshow('window', img2)
cv.waitKey(0)
cv.destroyAllWindows()
Splitting channels
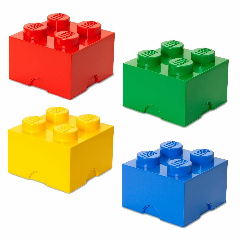
We can split an RGB image into it’s components. Let’s use an image which contains the three base colors.
We find each color component in the separate channel Blue-Green-Red.
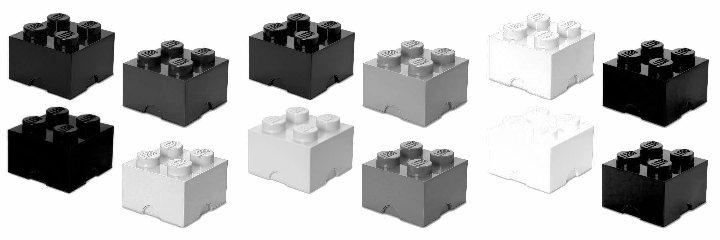
"""Splitting into 3 channels"""
import cv2 as cv
import numpy as np

img = cv.imread('lego.png')
b, g, r = cv.split(img)
img2 = np.hstack([b, g, r])

cv.imshow('window', img2)
cv.waitKey(0)
cv.destroyAllWindows()
Merging channels
We can merge channels.
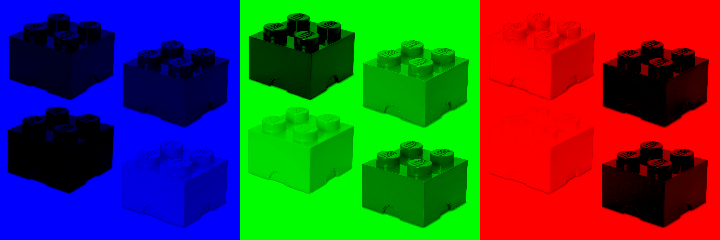
"""Merging 3 channels"""
import cv2 as cv
import numpy as np

img = cv.imread('lego.png')
z = np.zeros(img.shape[:2], 'uint8')

b, g, r = cv.split(img)
blue = cv.merge([b, z, z])
green = cv.merge([z, g, z])
red = cv.merge([z, z, r])

img2 = np.hstack([blue, green, red])

cv.imshow('window', img2)
cv.waitKey(0)
cv.destroyAllWindows()
A different and faster way of keeping only one color channel and setting the others to zero is to act directly on the Numpy array using slice indexing.
"""Numpy indexing."""
import cv2 as cv
import numpy as np

img = cv.imread('lego.png')
blue = img.copy()
green = img.copy()
red = img.copy()

blue[:, :, 1:] = 0
green[:, :, 0] = 0
green[:, :, 2] = 0
red[:, :, :2] = 0

img2 = np.hstack([blue, green, red])

cv.imshow('window', img2)
cv.waitKey(0)
cv.destroyAllWindows()
Color spaces
So far we have seen the RGB color space. However there are many other spaces.
The example below shows:
- HSV (Hue-Saturation-Value)
- L*a*b
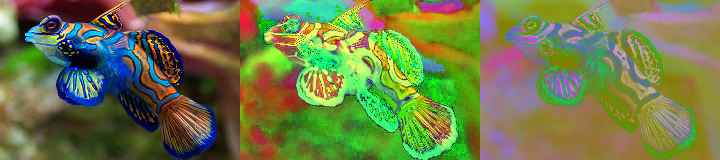
"""Change the color space."""
import cv2 as cv
import numpy as np

img = cv.imread('fish.jpg')
img = cv.resize(img, None, fx=0.5, fy=0.5, interpolation=cv.INTER_CUBIC)
M = np.ones(img.shape, dtype='uint8') * 40

hsv = cv.cvtColor(img, cv.COLOR_BGR2HSV)
lab = cv.cvtColor(img, cv.COLOR_BGR2LAB)
img2 = np.hstack([img, hsv, lab])

cv.imshow('window', img2)
cv.waitKey(0)
cv.destroyAllWindows()
Affine transformation
Here we use the mouse to rotate and scale.
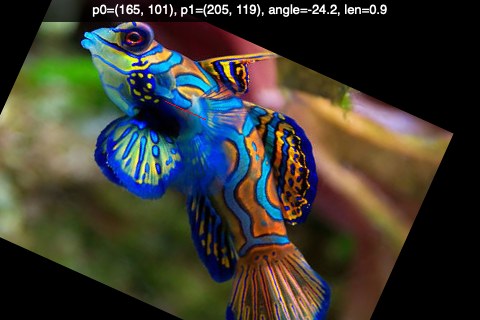
"""Rotate and scale image with mouse."""
import cv2 as cv
import numpy as np

RED = (0, 0, 255)
p0, p1 = (100, 30), (400, 90)

def mouse(event, x, y, flags, param):
    global p0, p1

    if event == cv.EVENT_LBUTTONDOWN:
        p0 = x, y
        p1 = x, y

    elif event == cv.EVENT_MOUSEMOVE and flags == 1:
        p1 = x, y

    elif event == cv.EVENT_LBUTTONUP:
        p1 = x, y


    dx = p1[0] - p0[0]
    dy = p1[1] - p0[1]
    angle = -np.degrees(np.arctan2(dy, dx))
    len = np.sqrt(dx**2 + dy**2) / 50
    cv.displayOverlay('window', f'p0={p0}, p1={p1}, angle={angle:.1f}, len={len:.1f}')

    M = cv.getRotationMatrix2D(p0, angle, len)
    img2 = cv.warpAffine(img, M, (w, h))
    cv.line(img2, p0, p1, RED, 2)
    cv.imshow('window', img2)

img = cv.imread('fish.jpg')
h, w = img.shape[:2]
cv.imshow('window', img)
cv.setMouseCallback('window', mouse)

cv.waitKey(0)
cv.destroyAllWindows()